Table of Contents
As my understanding of the underlying logic of networking and proxy technologies deepened, I began to grow tired of and dissatisfied with the traditional "airport" (proxy subscription) services available on the market. These services universally suffer from severe IP overselling — multiple users sharing the same IP not only greatly increases the risk of being blocked by the GFW (Great Firewall), but during peak evening hours, the congested links drastically reduce connection speeds. Moreover, in early 2026, authorities in China launched a harsh crackdown on numerous "airport" services, prompting many tech bloggers to advocate for self-hosting nodes using a VPS. Inspired by this, I conceived the idea of building my own overseas proxy server.
Starting to Build the Node
Understanding Server Network Routes
After researching the various VPS specifications, I zeroed in on the choice of "network route." Since I use China Mobile broadband, I decided to look for servers offering CMIN2 or tri-network optimized routes for a better direct connection experience.
At the time, most of the promotional server models I had my eye on were already sold out, so I had no choice but to wait patiently. It wasn't until April 21st that I saw a Telegram channel notification that VMISS had finally restocked its servers. Although only the single-network optimized version was available, I figured it was still fine, so I bought a 1-core, 1GB server on a CMIN2 route for CAD 50 per year.
Initial Attempt and Early User Management
Initially, to quickly validate my concept, I deployed the fscarmen/sing-box script on the
server. This tool is extremely beginner-friendly — it not only spins up a node rapidly but also enables
the BBR congestion control algorithm by default to optimize network throughput.
After the node was successfully running, I wanted to share it with friends, but on the condition that I kept core control in my own hands — meaning I could manage their access permissions at any time. After some exploration, I devised an "authentication" strategy based on Sub-Store:
- Import the original node into Sub-Store, then generate subscription links through it for sharing.
- Set up a script on the server to automatically rotate the node's UUID on a daily schedule.
- This way, once I revoke a friend's subscription access in Sub-Store, their client can no longer fetch the latest UUID for that day. As soon as the UUID fails to match on both ends, the connection is naturally blocked.
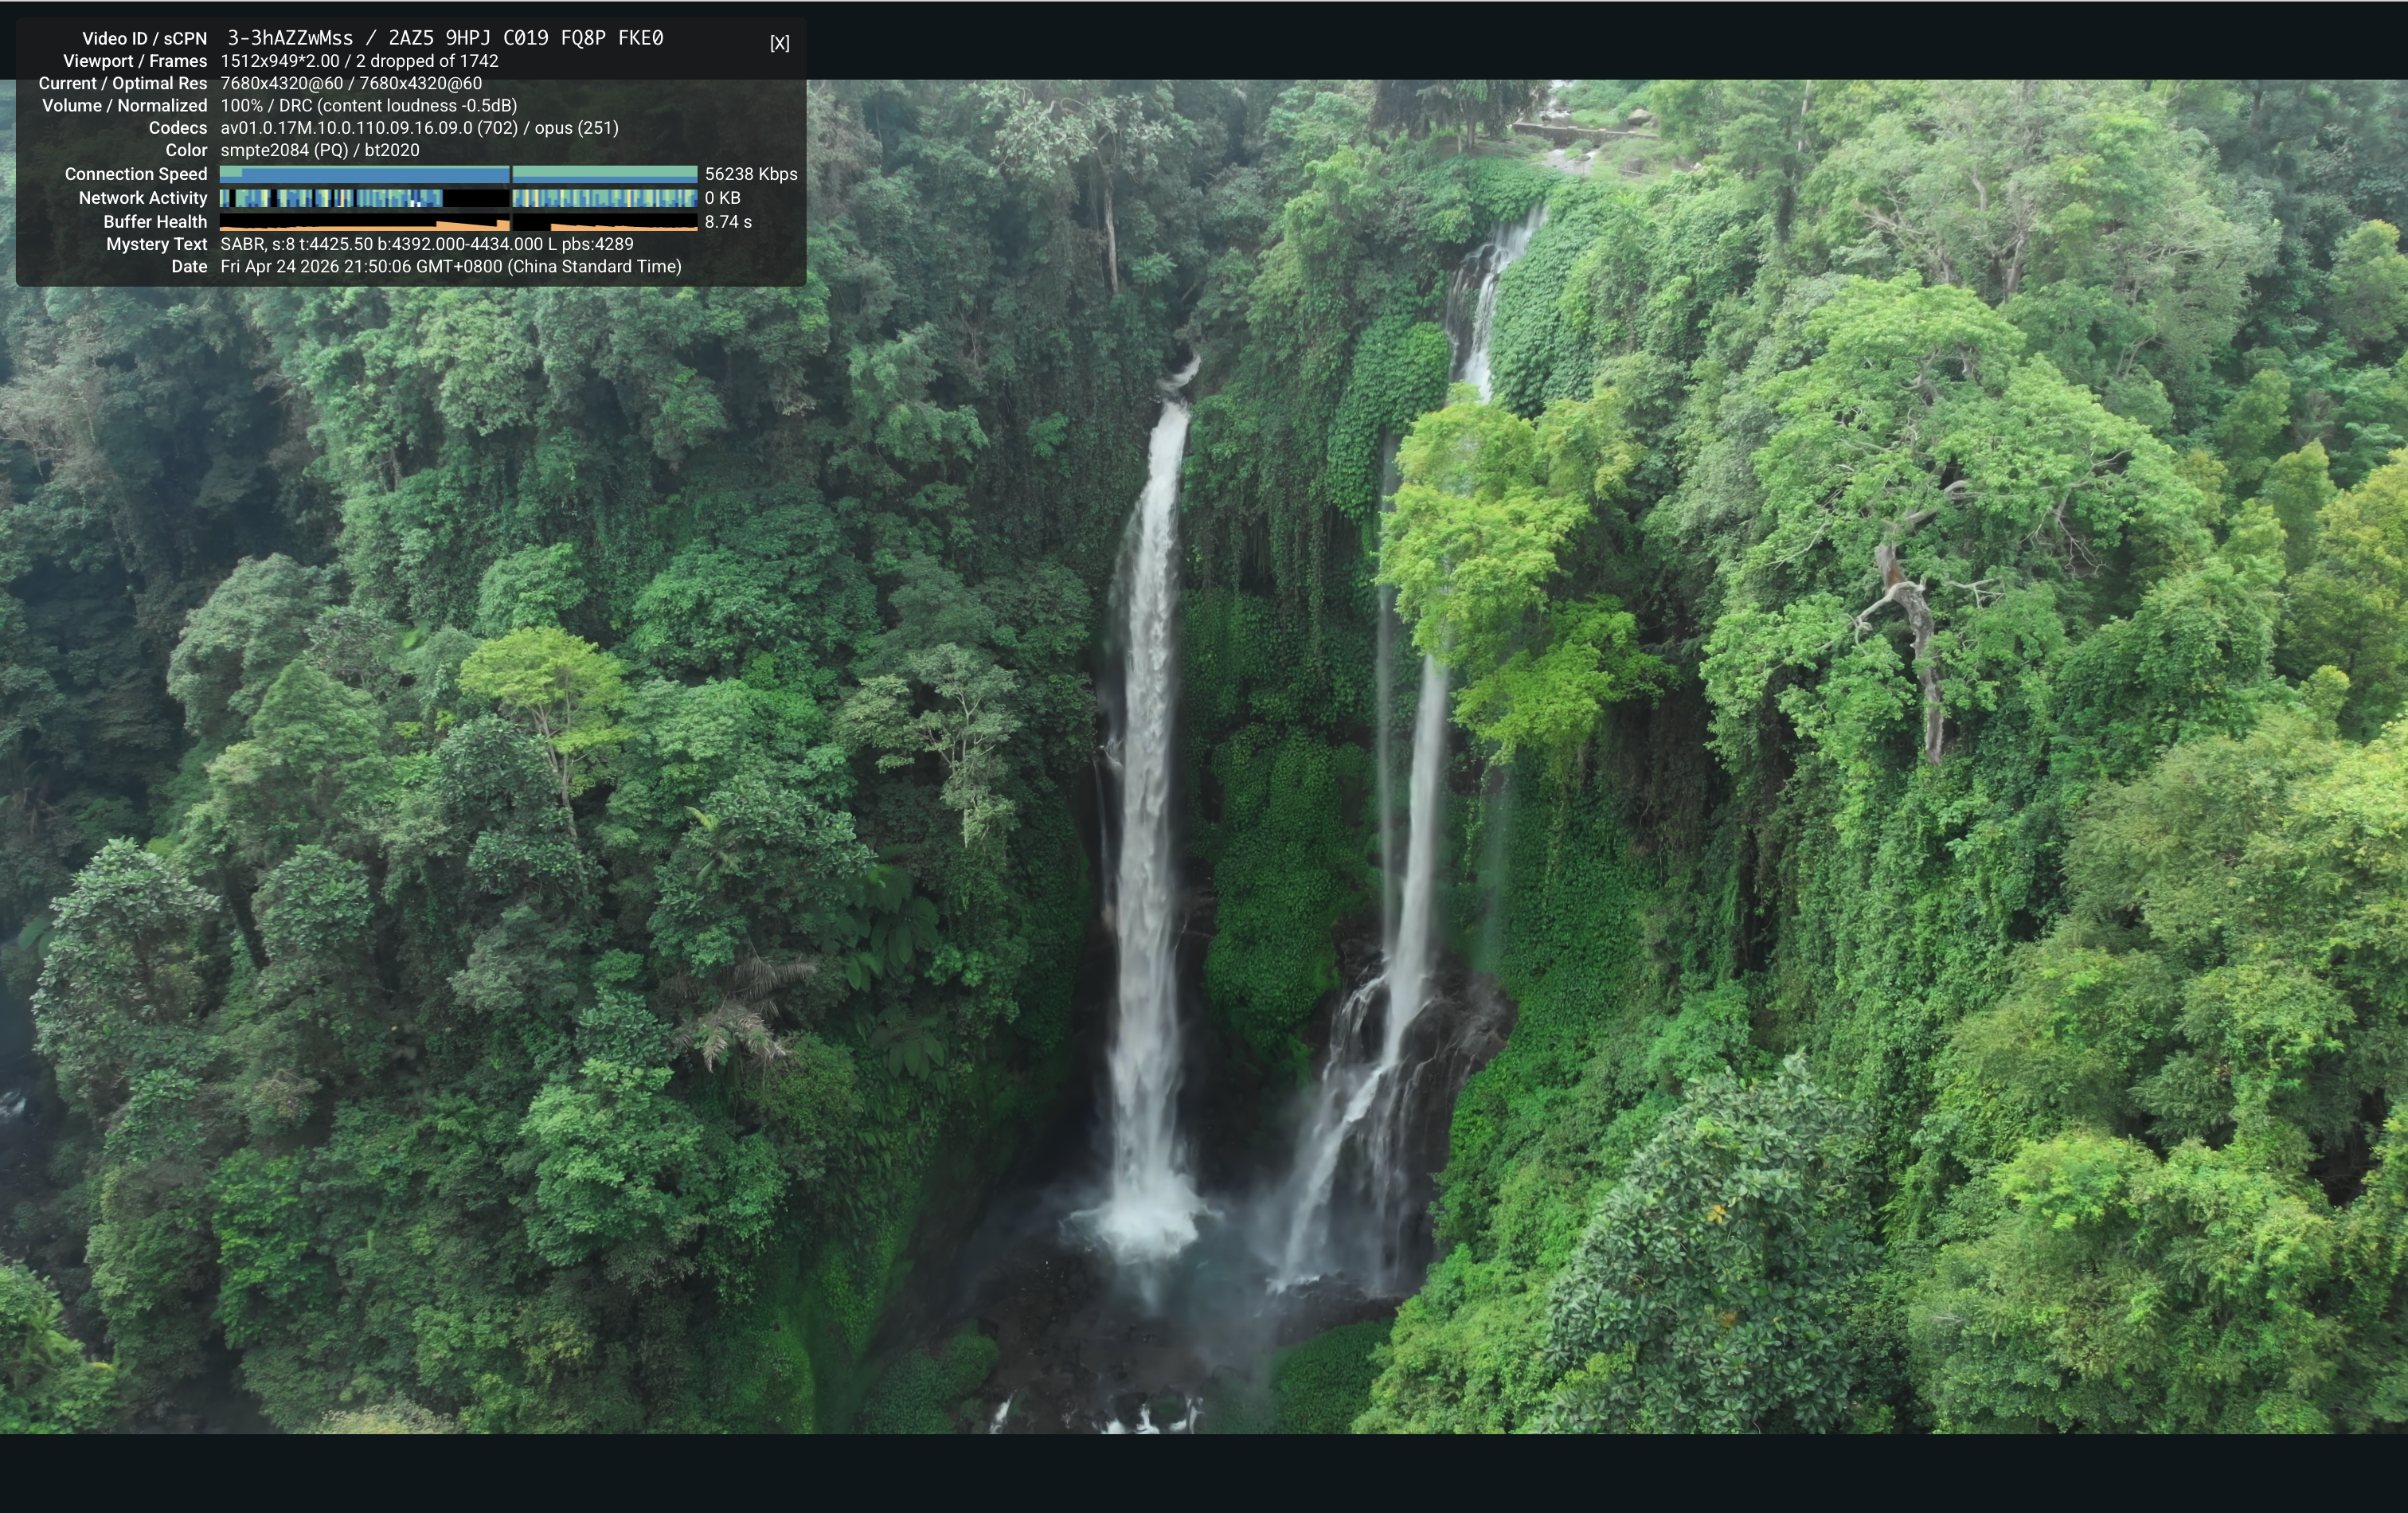
Subsequently, I conducted thorough testing on the server's routing. The results confirmed that under China Mobile broadband, it indeed routes through the CMIN2 line, with excellent latency and sufficient bandwidth to smoothly stream YouTube 8K videos.

Migrating to the s-ui Panel
However, as I explored further, I discovered an even more elegant ultimate solution: the
alireza0/s-ui panel.
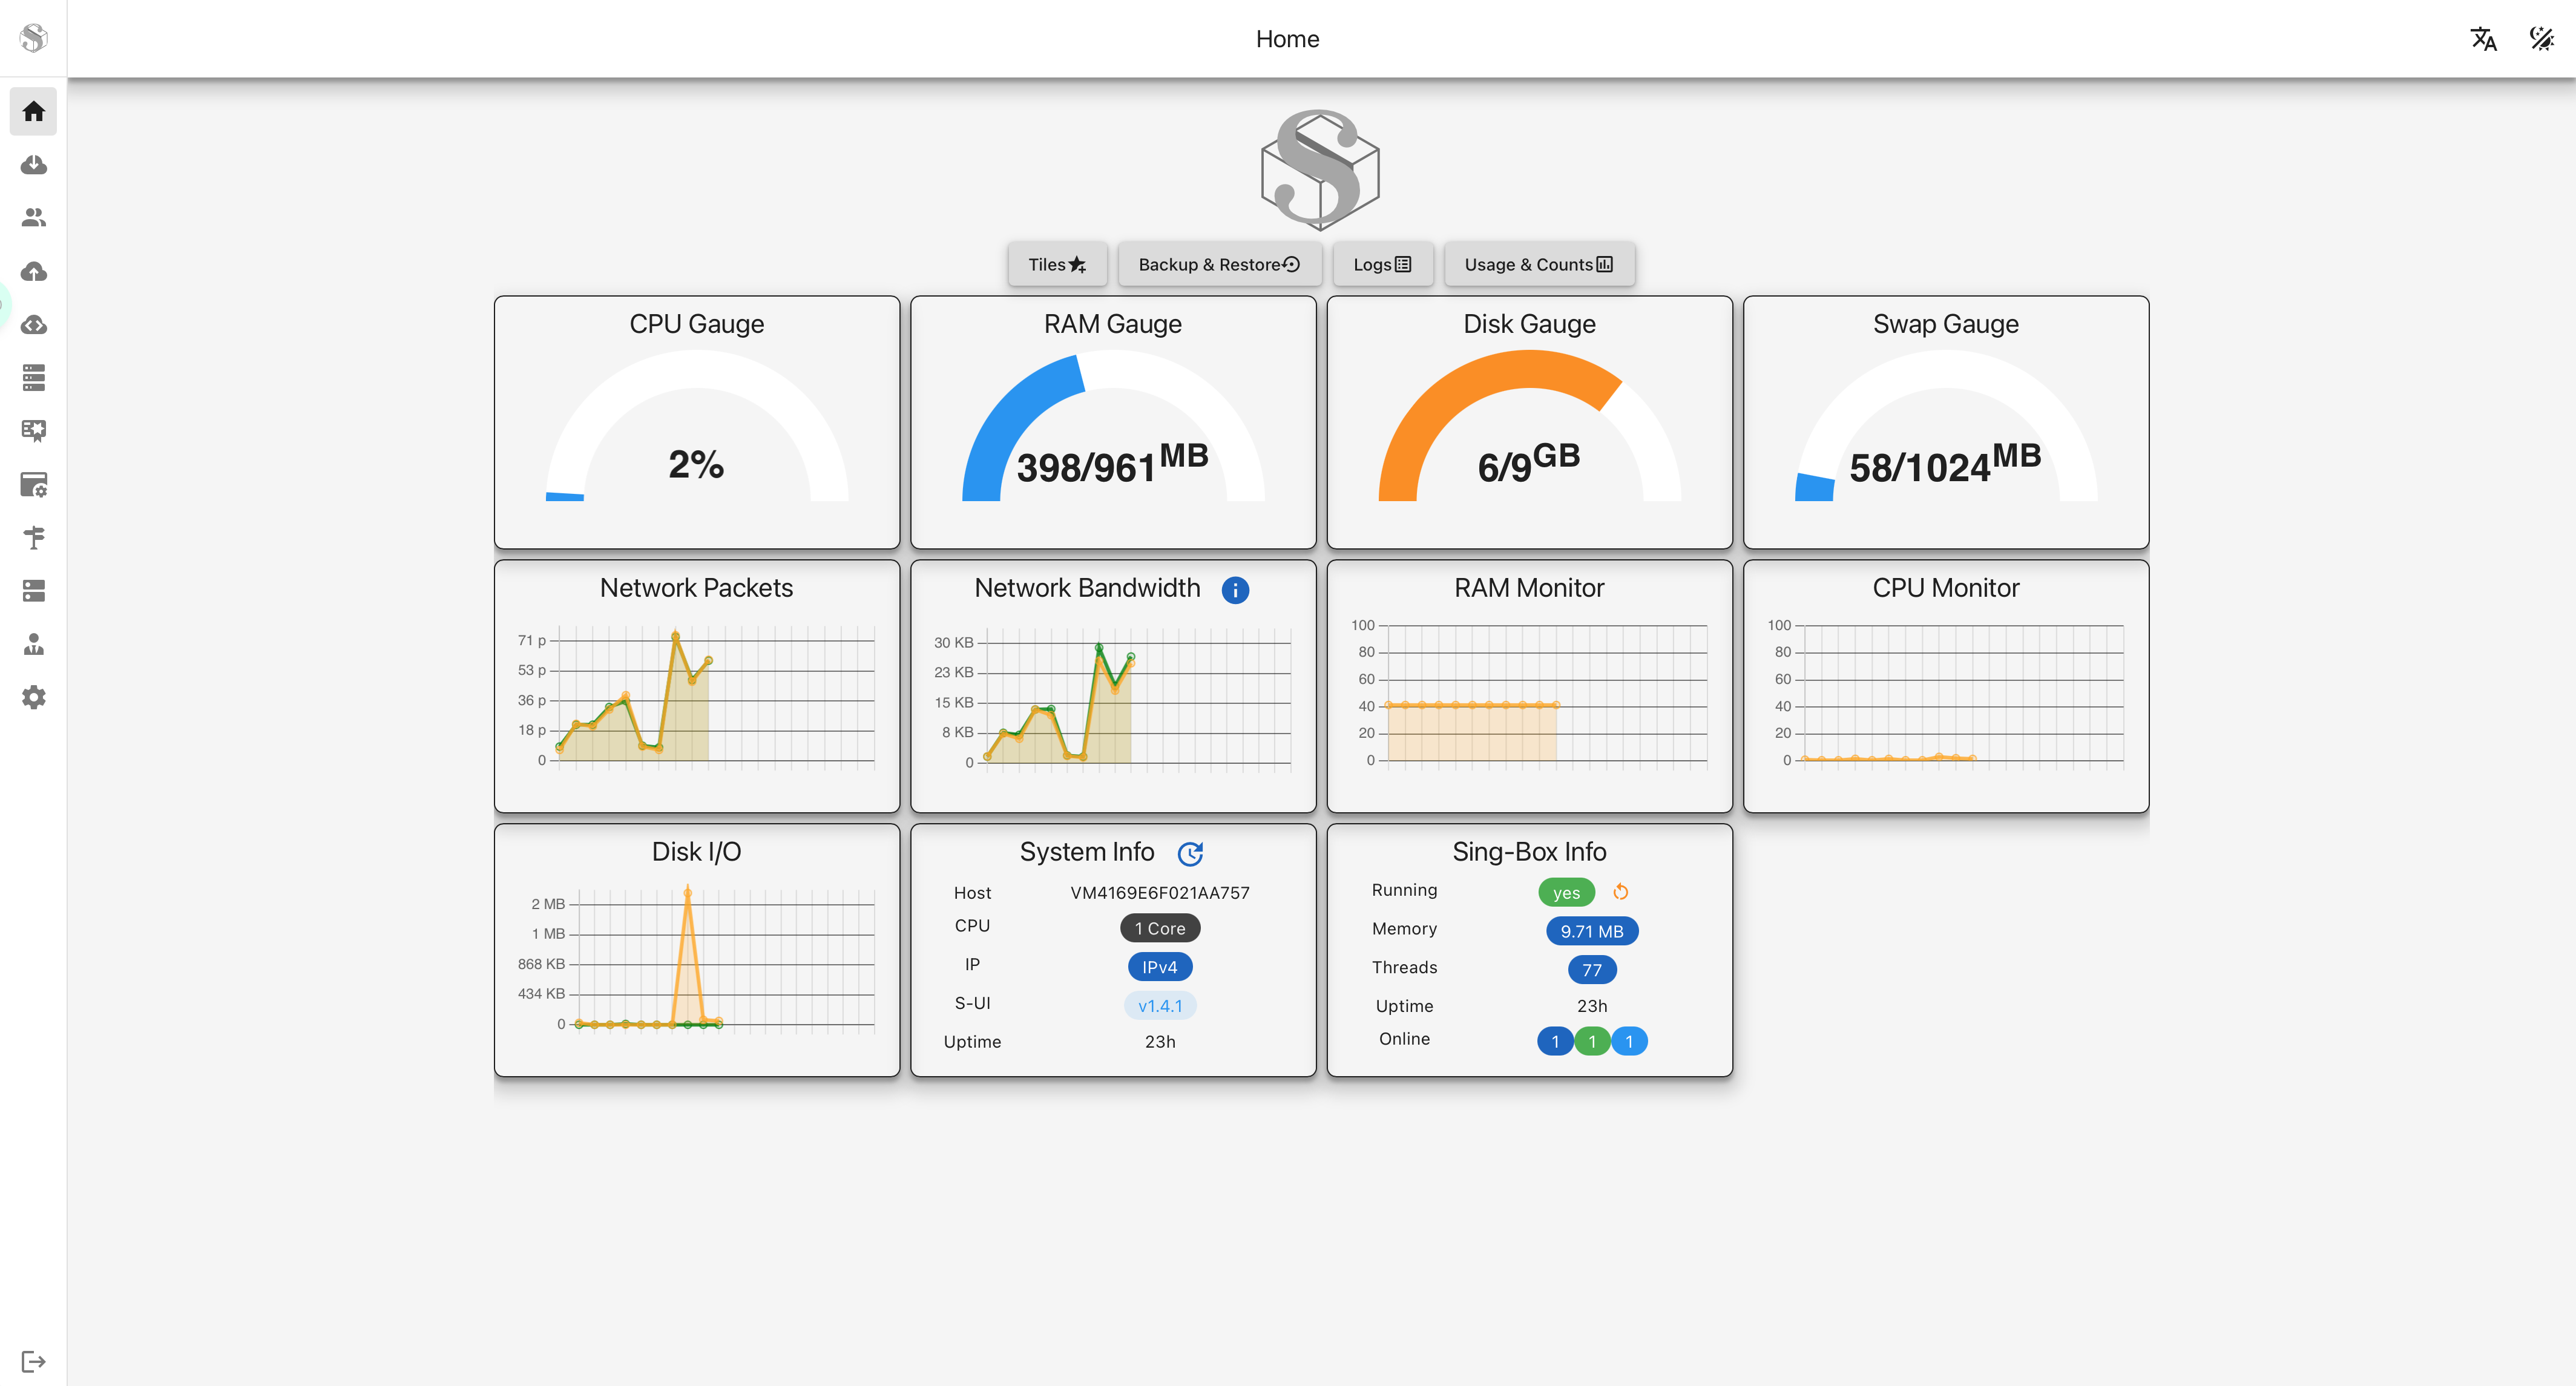
It is also based on the high-performance sing-box core, but offers an extremely intuitive Web UI interface. It not only monitors server resource usage in real-time but also has a comprehensive built-in multi-user management system. Now, I can create independent accounts for each friend, assign dedicated UUIDs, and precisely limit traffic caps and expiration dates. In the dashboard, their online status and traffic consumption are visible at a glance. If I need to revoke access, I simply delete the corresponding user in the panel with one click, and that UUID's connection is immediately invalidated. This not only significantly reduced my maintenance costs but also made node management more professional and efficient.
IP Blocked and Replacing the IP
However, good things don't last. About two days after stable operation, one evening I suddenly found that the node couldn't connect. My first instinct was that the server configuration had gone wrong, until I ran a test on Ping.pe and saw a sea of timeouts across mainland China. That's when it hit me: the IP had been banned.
I tried to "resurrect" the node through a Cloudflare tunnel (Argo Tunnel), but this approach caused speeds to plummet catastrophically. Left with no other option, I ultimately paid the service provider CAD 5 to get a brand new IP address.
Post-Mortem on Why the IP Was Blocked
After paying this "tuition fee," I began a thorough post-mortem on the root causes of the IP ban. Through research and deep reflection, I identified several fatal vulnerabilities from my initial setup:
- Obvious protocol signatures: During the early setup phase, I had kept legacy protocols like Shadowsocks that are easily identified and precisely blocked by the GFW.
- Improper port configuration: The VLESS+Reality protocol I was using wasn't bound to port 443, causing traffic to fail at perfectly masquerading as normal HTTPS traffic, ultimately revealing its true nature.
- Plaintext transmission risk: My s-ui panel was accessed directly via IP without a domain binding, exposing all management communications under plaintext HTTP.
- Exposed sensitive services: The server was also running Sub-Store and SubConverter Docker containers, similarly without domain bindings and using default ports, making them extremely vulnerable to active probing and scanning by the GFW.
The Final Hardening Plan: After learning my lesson, the moment I got the new IP, I carried out a thorough security hardening:
- Streamlined protocols: Decisively removed all protocols except VLESS+Reality and strictly bound it to port 443.
- Panel encryption: Bound the s-ui panel to a dedicated domain through Cloudflare, enforcing site-wide HTTPS encrypted transmission.
- Reduced attack surface: Completely took offline the Sub-Store and SubConverter containers that posed exposure risks.
After this entire ordeal of troubleshooting and optimization, my node finally entered a truly stable period. This experience not only gave me a high-speed private proxy but also provided me with profound, hands-on knowledge of network security and protocol disguise.
Building a Dark Web Site
When I bring up the "dark web" with my classmates, they often look at me with astonishment. In most people's preconceived notions, it's a lawless wasteland filled with pornography, violence, and illegal transactions. But after my own in-depth research, I discovered that the dark web's technical underpinnings are fascinating — it not only protects privacy, but actually hosts many perfectly legitimate sites. For instance, the CIA, Facebook, and even major news organizations all have official Tor hidden services.
I had actually planted the seed of building a dark web site in my mind long ago. My original intention was very simple: purely for technical learning and "hardcore tinkering," with absolutely no involvement in any illegal activities. But I was held back by not having a suitable overseas server (domestic machines in China can't directly connect to the Tor network due to the GFW), so the plan was shelved indefinitely. Well, now that I'd just finished setting up this US VPS, I decided to go ahead and get this dark web mini-site up and running.
Generating a Custom .onion Domain
The first step in the setup process was obtaining a .onion domain.
To give the domain a personal touch, I had previously used mkp224o, a brute-force
collision tool, burning through computing power to painstakingly generate a vanity address starting with
the pinyin of my name. But back then, due to inexperience, I only saved that flashy address string and
completely forgot to back up the corresponding public-private key pair (Keypair). In the Tor network,
without the keys, there is no ownership — that address I had worked so hard to compute became nothing
more than a decoration, completely unusable.
With no better option, I had to let my computer fan scream and CPU max out through another all-nighter,
re-running mkp224o to generate several new addresses starting with my name. This time, I
was extremely careful to properly back up the generated key pair folders.
Server Deployment
With the custom domain and keys secured, deployment on the Ubuntu server was fairly straightforward. The entire architecture isn't complex — the core concept is to receive dark web traffic through Tor and forward it to the web server for processing:
- Environment Setup: First, use the
aptpackage manager to installtorandnginxin one go. - Configure the Tor Node: Edit the
/etc/tor/torrcconfiguration file, enable the hidden service (HiddenServiceDir), point the path to the directory containing my freshly generated key pair, and set up port forwarding (HiddenServicePort) to forward incoming port 80 traffic to the local Nginx listening port. - Configure the Web Service: Finally, adjust the Nginx configuration to act as a reverse proxy. When Nginx receives local requests forwarded by Tor, it can smoothly serve back the static web page content I've written.
After everything was configured and services restarted, I typed that unique string of characters into the Tor Browser. As the page loaded successfully, the entire workflow was confirmed working, and my hidden corner on the Tor network — my "Forgotten Archive" — was officially built and successfully brought online!